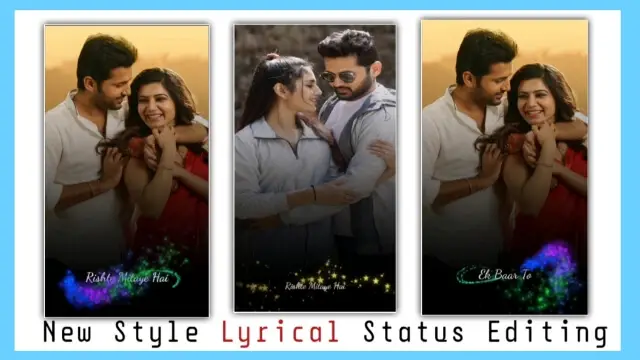
Black Shadow Lyrics Video Editing | Learn Editing

Black Shadow Lyrics Video Editing | Learn Editing: Hello friends Video In today’s article, I am going to teach you to Black Shadow Lyrics Video Edit viral Instagram. Friends, such Lyrics Video are currently running in very high Trend in Instagram Reels. So if you also upload Reels on your Instagram account, you can upload such a make.


But now you have questions in your mind as to how to Edit such a video so today’s article is for all of you. So friends, in today’s post-Black Shadow Lyrics Video Editing, I’m going to tell you how to Edit this video step by step.

Black Shadow Lyrics Video Editing | Learn Editing

Well, it’s very easy to make this video. If you read my post with full understanding, I hope you don’t have any difficulty Editing this video.


First of all, Let me tell you that you need to Alight Motion Application to Edit this video because we Alight Motion Application to Edit this video they are going to use it. So if you don’t have the Alight Motion Application, Install it with Play Store.

Black Shadow Lyrics Video Editing | Learn Editing

  • Alight Motion Application
  • Light Effect Lyrics Video
Black Shadow Lyrics Video Editing | Learn Editing

Black Shadow Lyrics Video Editing | Learn Editing

Steps 1
Open the Alight Motion Application on your mobile phone and create a new project with 9:16.

Steps 2
Now Import the photo in which you want to make the video first in this project.

Steps 3
Now increase the length of this image for as long as you want to Edit the video.

Steps 4
You then have to click on this image layer and click on Effect and select the Swing Effect.

Steps 5
Now you have to Edit Effect so open the Effect to Edit and set Angle 1 to -3.0 as well as Angle 2 at 3.0.

Steps 6
Now you have to add another Effect called Oscillate. So select it and add it and set the Frequency to 0.८०Hz.

Steps 7
Now you have to click on the icon of “+” in this project and click on the shapes and select square shape. Then, click on the Shape layer and go to the Moov and Transform option and increase the scale.

Steps 8
Now you have to go to the Color option of the shape layer and select the Black color. Then select the color option pay gradient and place the black part at the bottom and select the transparent color in the upper part.

Steps 9
Now you have to add Light Effect Lyrics Video to this project and set it in black color and go to Blending Opacity and select Screen.

Steps 10
Now friends have become your video. You then have to Export the video.

Conclusion:
So, friends, I hope all of you friends liked my post-Black Shadow Lyrics video Editing today and you must have helped you a lot in video editing.


So if you have any questions or suggestions related to this article, please comment and tell us.

Subscribe To Us On YouTube.

All Materials:

You Can use these Materials For Practise Propose Only Of This Tutorial.

Download Now

Thank You For Reading My Article.

Comments

Popular posts from this blog

Image With Chat Lyrics Video Editing

Image with Chat Lyrics Video Editing : Welcome to all of you in one of our new articles. Friends, in today’s article Image with Chat Lyrics Video Editing , we are going to learn a very great video editing. Friends, you must have seen many such status videos in which there are lyrics videos like WhatsApp chats. So today we are going to edit the same kind of video but we will also add our photo to it. You can create the same chat with video lyrics as well as add your photo. As you may have seen in the thumbnail of this article. So we are going to learn to edit the same status video. Here, if you want, you will be able to add your photo to the lyrics video very easily. So if you also like to upload new types of videos on your social media account, then you must upload the video that you will teach to make in today’s article Image with Chat Lyrics Video Editing , and share it with your followers and friends. Image With Chat Lyrics Video Editing Friends, when there is video editing, you w...

Film Frame Anniversary Video Editing

Film Frame Anniversary Video Editing: Friends, welcome to all of you in one of our new articles. In today’s article Film Frame Anniversary Video Editing , we are going to learn to edit not one kind of anniversary status video. Your anniversary is going to come closer soon and if you want to edit a great video for your partner, then today’s article Film Frame Anniversary Video Editing is going to be very helpful for you because today I am going to teach you to edit a very amazing anniversary status video through this article Film Frame Anniversary Video Editing. Film Frame Anniversary Video Editing. Friends, today I am not going to learn video editing here, you do not need a computer or laptop at all, you will be able to edit such videos very easily from your mobile. Yes, you will need some of my material and application to edit this video. I will provide you at the end of this article in that material, now the matter is about the application, which is the applications an...

Blogger Theme Blur Thumbnail Solution

Blogger Theme Blur Thumbnail Solution: Friends If you’re creating your Website or Blog on Blogger and using Blogger Theme, the Thumbnail image has a Blur image problem . So today’s our post- Blogger Theme Blur Thumbnail Solution is going to help you. Blogger Theme Blur Thumbnail Solution Friends today’s post- Blogger Theme Blur Thumbnail Solution I am going to tell you the solution to this problem. So most of this problem is seen in Blogger Free Template. So if you are also having this kind of a problem on Blogger Website, follow all the steps that you have mentioned in today’s post – Blogger Theme Blur Thumbnail Solution . So to solve this kind of problem you need to paste a code into the HTML of your Blogger Theme. So I’ll give down the code you have to paste. Before that, follow the steps below. Blogger Theme Blur Thumbnail Solution Step By Steps: First copy the code below. Go to your Blogger Dashboard and click Theme Pay. Go to Theme and click...