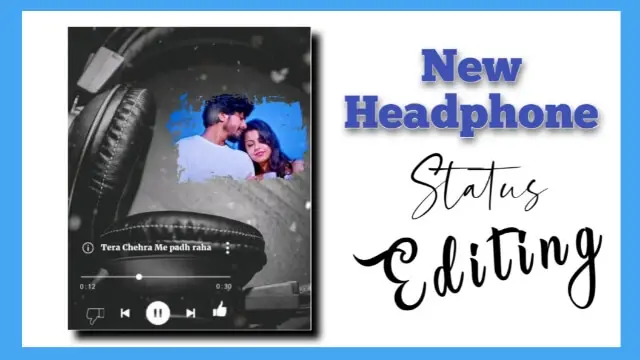
Black Headphone Status Editing: Hello friends, welcome to all of you on our blog, and today’s article is going to be very special. Friends, Through our article Black Headphone Status Editing today, I am going to teach you to make a very brilliant headphone status video. Friends today’s video is running very much on the Pinterest application running on the train. If you have also used the Pinterest application or opened it and if you watch some videos on its Trend page, you must have received the video from it. At the same time, friends, some such videos are going viral on Instagram reels right now.
So if you also want your account to reach more audiences, you must also make and upload this video. So now that it comes to how you can make this video, through our post-Black Headphone Status Editing today, I’m going to tell you the whole way how you can make this video, and if you want, you can add your photo inside it. So the article is going to help you a lot, so be sure to read the article in full and if you like this article, do share it with your friends and relatives.
Black Headphone Status Editing
So let’s first talk about editing this video. So you’ll need the Alight Motion application to edit this video. So you all know that this application will be easily available to you on the Play Store. If you don’t have it, go to the Play Store and install it from there.
Now, apart from the Friends application, you will also need a headphone image to make this video here which I have given at the end of this article. So, you take that also from there. So let’s start our article Black Headphone Status Editing today, not losing much time now.

Black Headphone Status Editing: Essential Steps:
- Alight Motion Application
- Black Headphone Image
- Dust Black Screen
Black Headphone Status Editing: Topic Covered:
- Alight Motion Editing
- Learn Editing
- Status Editing
- Alight Motion Video Editor
- Headphone Status Editing
- Video Editing Tutorial
Black Headphone Status Editing: Step By Step:
Steps 1
First, open the Alight Motion Application on your mobile phone.
Steps 2
You then have to open a new project of 4:5 here.
Steps 3
In this project, you have to add any song on top of which you want to edit the video by clicking on the plus icon.
Steps 4
Then you have to cut off the front part of the song after coming forward for as many seconds as you want to make a video. So to cut, you get three buttons at the top, clicking on the right side of the last button, the song will be cut.
Steps 5
Now you have to come to the start point in this project, click on the plus icon, and import the image with the headphone image that I have given to this project.
Steps 6
Now you also have to mix the length of this image with the length of the song.
Steps 7
You then have to add your photo to this project, place the photo layer under the headphone image after adding the photo and set it on the back of the green color where the green color is in the headphone image.
Steps 8
Now you have to click on the image layer with headphones, go to the effect option Add Effect, and add the effect of chroma. After adding the effect of chroma, you have to go to the color, set the green color and increase the Threshold so that the green color that is there will be removed.
Steps 9
Now you have to import Dust Black Screen into this project and you also have to mix it with the length of your video and cut off the next text. Then go to the blending option and select the screen in the lighten.
Steps 10
With this, your video will become completely complete. Now watch the preview of the video. If the video is made perfectly, export the video, and the video will be saved in your gallery.
Conclusion:
Every day, I hope you all like our article Black Headphone Status Editing today. If you have any questions related to this article, either suggestions, please comment and tell us.
Subscribe Us To On Youtube.
All Materials.
You can Use These Materials For Practice Propose Only Of This Tutorial.
Download NowThank You For Reading My Article.
Comments
Post a Comment