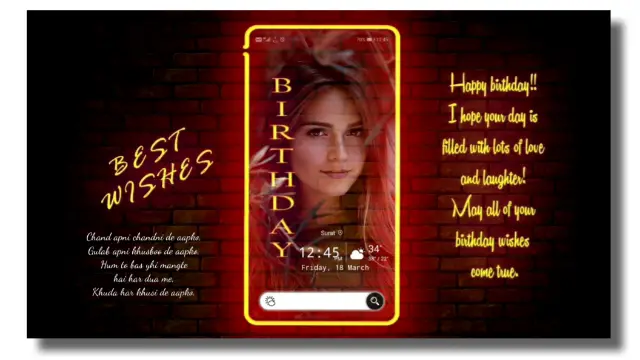
Neon Birthday Status in Kinemaster: So guys I arrived and took a new kind of Birthday Status post. Friends, today’s post Neon Birthday Status In Kinemaster I will teach you how to create a birthday video status above a Neon Background. So let me give you some information about today’s video editing.
Neon Birthday Status In Kinemaster
So, friends, you will have to wish them a Birthday on the birthday of your friend or relative. You must also keep your Social Media account, especially the status of your friend’s photo on WhatsApp. So guys if you want to upload an attractive video instead of your friend’s photo on status, but don’t come to edit the video, this post Neon Birthday Status In Kinemaster is going to be like you.
Friends Today I’m going to tell you a very easy way to edit videos above a very attractive Neon Background with Neon Birthday Status In Kinemaster. So let’s start our post on today’s Neon Birthday Status in Kinemaster.
Neon Birthday Status In Kinemaster: Essential Steps:
- Neon Background Video
- Date And Time Image
- Wishes Video
Neon Birthday Status In Kinemaster Topic Covered:
- Birthday Status
- happy birthday status
- birthday wishes in Hindi
- happy birthday wishes in Hindi
- happy birthday status in Hindi
- birthday status in Hindi
Neon Birthday Status In Kinemaster Step By Steps:
Steps 1
To create neon Birthday Status, you need to open the Kinemaster Application on your mobile phone and select the 16:9 ratio.
Steps 2
You have to import Neon Background Video into this project.

Steps 3
Now you have to import the image with the Date and Time into the project in this project. After you add the image, you have to crop this image and just let the Notification Bar stay, set this Notification Bar upwards.
Steps 4
Then you have to create a Duplicate layer of that image and make that Duplicate layer appear in the date part from the crop option and set it in the middle.
Steps 5
Now you have to set the date in this image.
Steps 6
You then have to import the Wishes video into this project and select screen Effect by going to the blending option.
Steps 7
After doing so, you have to come out of this project and open a new project by selecting a new 9:16 ratio.
Steps 8
Now add 5 or 6 photos of the project for which you want to create a Birthday Status.
Steps 9
After you add the photo, add fun Transition Clip Graphics to all photos, then export the video.
Steps 10
After exporting the video, you have to open the old project and import and set the video export in this project now.
Steps 11
After doing so, you have to see the preview of the video and export the video if the video has become perfect.
Conclusion:
So friends hope you may have liked this post Neon Birthday Status in Kinemaster today, if you have any questions or suggestions related to this article, Do comment.
All Materials
You Can Use This Materials For Practice Purposes only for this Tutorial
Download NowThank You For Reading My Article
————————————
Comments
Post a Comment